Configure API Account
First step...
Account Management
Once your account is created, you will get the login credentials through email to your registered email address. The login credentials provided are temporary and must be updated/changed right after your first successful login. This ensures the security and privacy of your login details and allows you to have your desired password.
The password you create after your first login will be the one you need to provide to log in to your SingleView ERP Integration API account from now on.
Important information
- A registered user can access the login platform only by providing valid login details
- No user can access the platform or the available options unless logged in
- The temporary password will expire right after your first successful login
- The login platform is case-sensitive. Ensure the Caps Lock and Number Lock status is correct before entering the details.
WarningAs a protective and security measure, a user account that has gone through 3 failed login attempts will be automatically disabled. To re-enable the account, contact SingleView support and provide the necessary information and reasoning.
Setup your Profile/SingleView Account
After you have completed the First-time login process, you need to configure your account, i.e., add appropriate details to access all the available options. To begin the process, go to the "Profile" page by clicking on the Profile icon at the top-right corner. The following information in the mentioned categories is required to set up your SingleView API account:
Company info
- Name - Name of the user
- Company logo - Upload a logo of your company
- Group - Select the Group to which the company belongs. Leave in case of an individual company.
- Address - Company location
- Business type - Type of the business or industry or field
- User type - Type of the user
- Currency - Selected currency to perform the functions and viewing
- License details - Details about the license, expiry date, subscription plan
- ERP Service - Details about the connected or serviced ERP
- Payroll - Status of payroll services
- Call-back Payment Status URL - URL details
- Call-back Payment Charge URL - URL details
Client info
- Client Details - Client ID and Client code details
- Signature Key - Signature key to generate Signature code
Sign in & Security
- Name - Name of the user
- Username - Login username
- Email Address - User's email address and verification status
- Password - Password of the account
- Phone - Phone number of the user
- Enable/Disable user - Option to enable or disable the user
- Group Admin access - Option to provide access as a Group Admin
- Two-step Verification - Status & Setup Two-Step Verification
- Multi-Factor Verification - Status & Setup MFA
- Biometric - Add or delete Biometrics for login
Banks
List of the banks that the user can access as per the license plan or subscription
NoteViewing the above information and having access to edit it will depend on the role of the user account. Some of the accounts/users may need help finding these options.
User Management
You can create new users for your team and assign them particular roles. These roles will determine their authority in the workflow.
Important informationPrior to creating a user, creating a role is recommended. Similarly, if you plan to create multiple users, please create sufficient roles and assign them during the user creation.
Types of user roles
There are majorly four types of user roles:
- Initiator - Creates the requests and initiates its processing in the workflow
- Reviewer - Reviews the created request and assigns it to the approver
- Approver - Approves the created request
- Executor - Based on the approval from the prior levels, an executor processes the request
NoteWith user roles, approval flow or workflow can be created. Any open spot in the flow will not allow the processing of the request.
Create a user role:
You can create a user by following the below steps:
- Go to profile
- Select "Role Management"
- Click on "Create role"
- Assign a role name and select the modules to govern the involvement of role authority
- Once you have provided the above details, click on the "create" button
A user role with the mentioned name will be created.
Create a user:
You can create a user by following the below steps:
- Go to profile
- Select "User Management"
- Click on "Create user"
- Assign a role and fill in the appropriate details
- Once you have completed the above steps, click on the "Create" button
A user with the mentioned name will be created and notified using the contact details.
ImprortantEnsure to check the company selection before creating the role or user. The selected company will inherit the new role or user created.
Workflow Management
You can create new users for your team and assign them particular roles. These roles will determine their authority in the workflow.
Create a new workflow
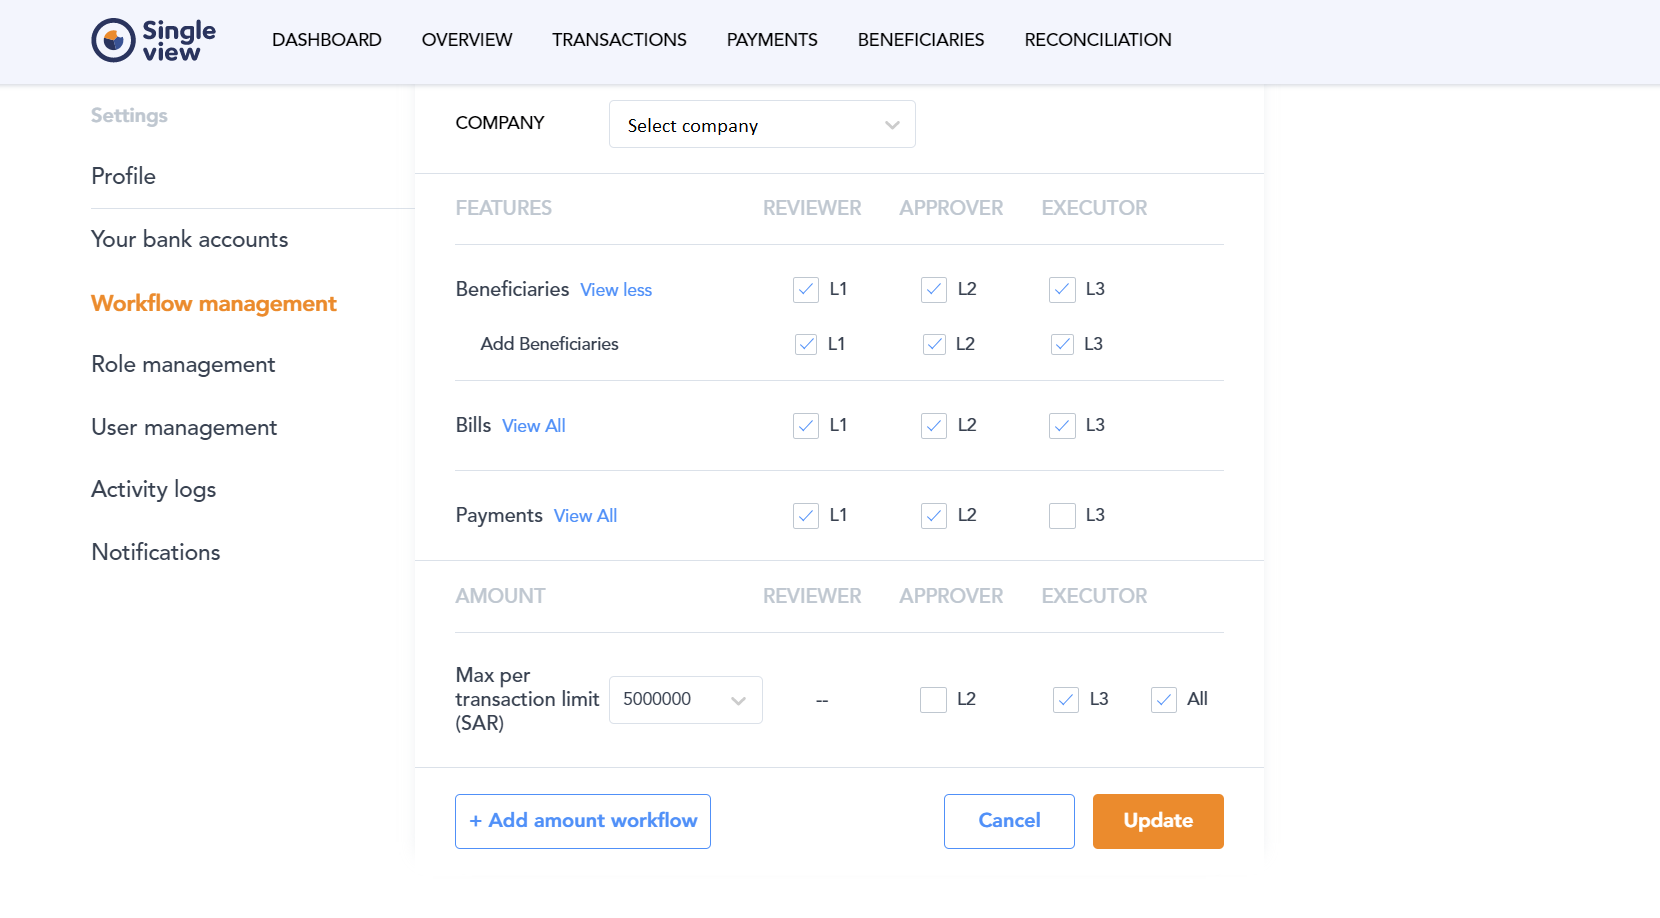
Please follow the below steps to create a new workflow or modify an existing one:
- Go to "Profile"
- Select "Workflow Management"
- Select the company from the drop-down list
- Click on "Edit"
- You can see an option to create a new workflow. Select to begin creating a new
- Select appropriate levels to be involved in the workflow by checking the boxes beside the roles
- Once you have completed the above steps, click on "Create."
A new workflow will be created and is ready to operate in the mentioned flow.

Image represents Workflow Management section under settings
Important informationEnsure to check the company selection before creating the workflow. The selected company will inherit the new workflow created.
Updated 22 days ago